
Want better Facebook ad results? Do your Facebook ads reach the right people at the right point in their customer journey?
In this article, you’ll learn how to develop Facebook audiences for targets which have already purchased from and generally speaking will give you the highest margin on ad-spent.
If you are using Shopify make sure you use a tool like Custom Audience Sync to create the a Custom Audience beforehand. Otherwise you can create a Custom Audience by uploading customer records using a CSV file exported by your store software.
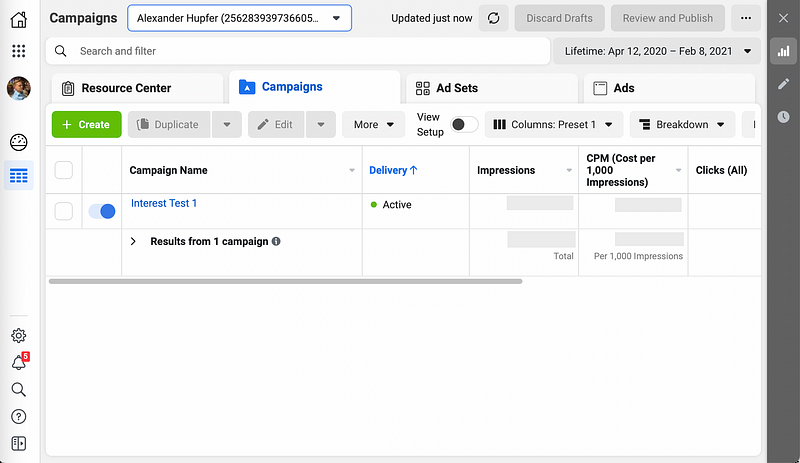
To start go to the Facebook ads manager. Make sure to select the ad-account that you would like to use in the topmost dropdown menu in case you have multiple ad-accounts. Next hit the create ‘Create’ button to create a new campaign.
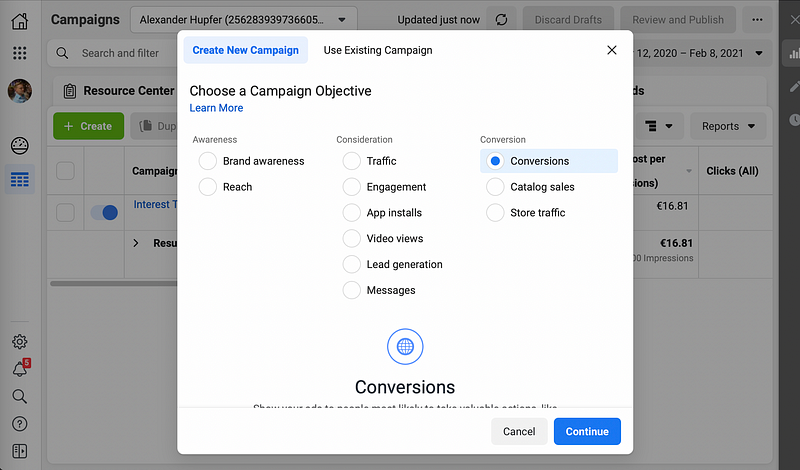
This bring us to the selection of the campaign goal where you want to select ‘Conversion’. This will tell the Facebook algorithm to optimise for actual sales and not just ‘intent indicators’ like ‘Store traffic’.
In the next step you can give a name and further down I recommend enabling ‘Campaign Budget Optimization’ to give Facebook a daily allowance. As a rule of thumb this should multiple of your conversion value if you are in the ‘discovery phase’ of your campaign creation where you try and test various creatives or you full budget once you are scaling your campaign.
Now we can hit next and go to the ad-set creation, where things get really interesting. First we need to set our conversion event. You want to double-check that the Pixel ID matches the one you have set up in your shop and set the conversion event to “purchase”. It is important you be upfront and choose thing like “add to cart” or any other events because this is for what Facebooks awesome algorithm will optimize for. You do not want Facebook to optimize your campaign to target people how just window-shop and ultimately don’t go through checkouts.
Next we come to the Create New Audience section. Click into the search exiting audiences field and a dropdown menu will open. Here we choose our custom audiences that we have set up either using the CSV upload method or by an Shopify app like Custom Audience Sync. For a walkthrough on how to set up Custom Audince Sync I recommend watching this walkthrough.
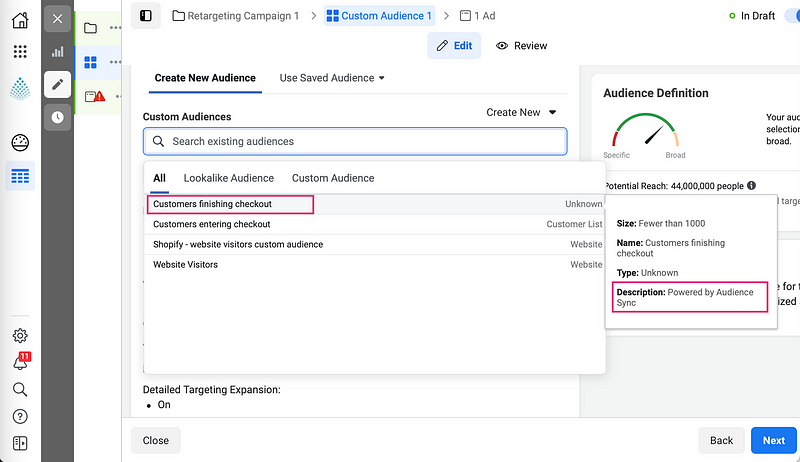
This tells Facebook that it should only show the our ads to people who are in our the selected Custom Audience, in this case, people who have actually finished a checkout previously.
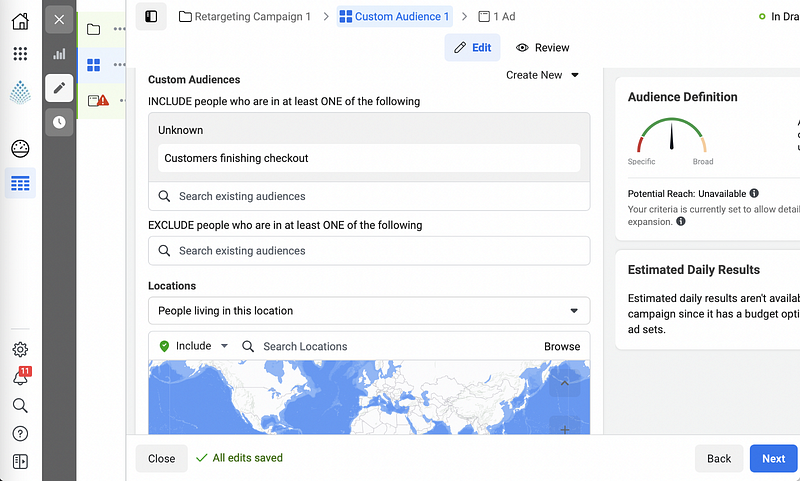
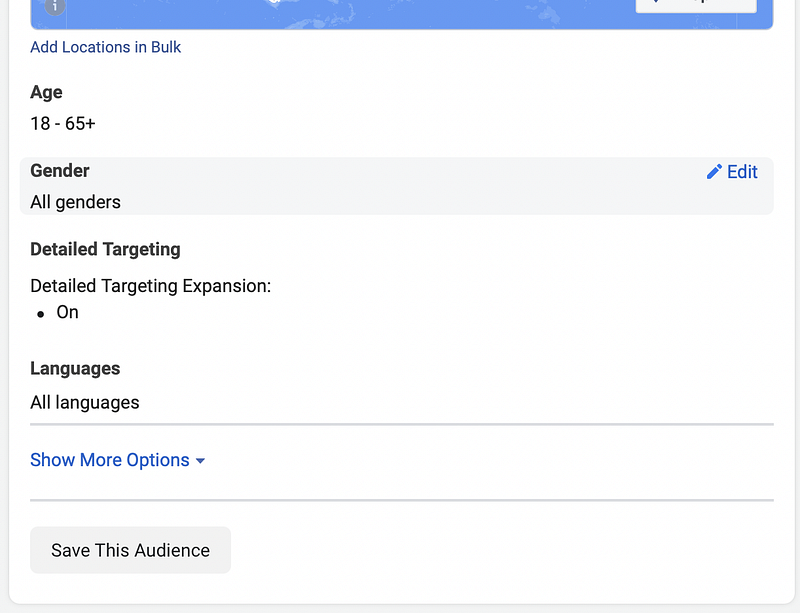
You probably want to target certain geographics depending on your shipping abilities. For the very popular e-Packet for example you can paste this list of countries using the “Add Locations in Bulk” feature.
Leave the other setting as they are, unless you have products that are very specifically for on gender or age group. This again gives the Facebook algorithm the freedom to maximize the convertion rate.
Now you are ready to go and continue to the creation of you creative. After you finished you have a highly converting Ad campaign that will even get better over time.
Conclusion
Product, price, promotion, and place are all important variables when it comes to running Facebook ad campaigns. However, all of your careful planning and effort could be in vain if you’re not targeting your ads at the right people. The audience above can help you drive the most profit from your Facebook ads.